
Cheesemaking made simple: your guide to italian flavors
- Sustainable Living
How We Make Farm Fresh Cheese
Have you ever wanted to make your own fresh cheese at home? Well today, we’re going to show you how we make some of our favorite cheeses.
Here in Italy, we have a rich cheesemaking heritage. We have some of the finest artisanal cheese makers in the world, and they have dedicated their entire lives to perfecting their craft.
We love our plentiful varieties of cheese very much, and at every Italian table, cheese is the centerpiece. You could even say, it’s the glue that connects everything together. We eat it with fresh produce, we infuse it into our most delicious pasta dishes, we eat it with freshly made bread, and so much more. It brings our communities together and has sustained us for hundreds of years.
Here at the farm, we regularly make cheese too. We’ve mastered the art of making mozzarella, halloumi, and feta! Oh, my goodness, these cheeses are so good!
So, we decided that we just had to share this delicious loveliness with you, our readers! Once you taste the flavor of homemade and freshly made cheeses, we know you’ll never want to go back to store-bought again!
Let’s get into how to make these fabulous soft cheeses, shall we?!…Oh, and don’t be surprised if you get a little hungry.

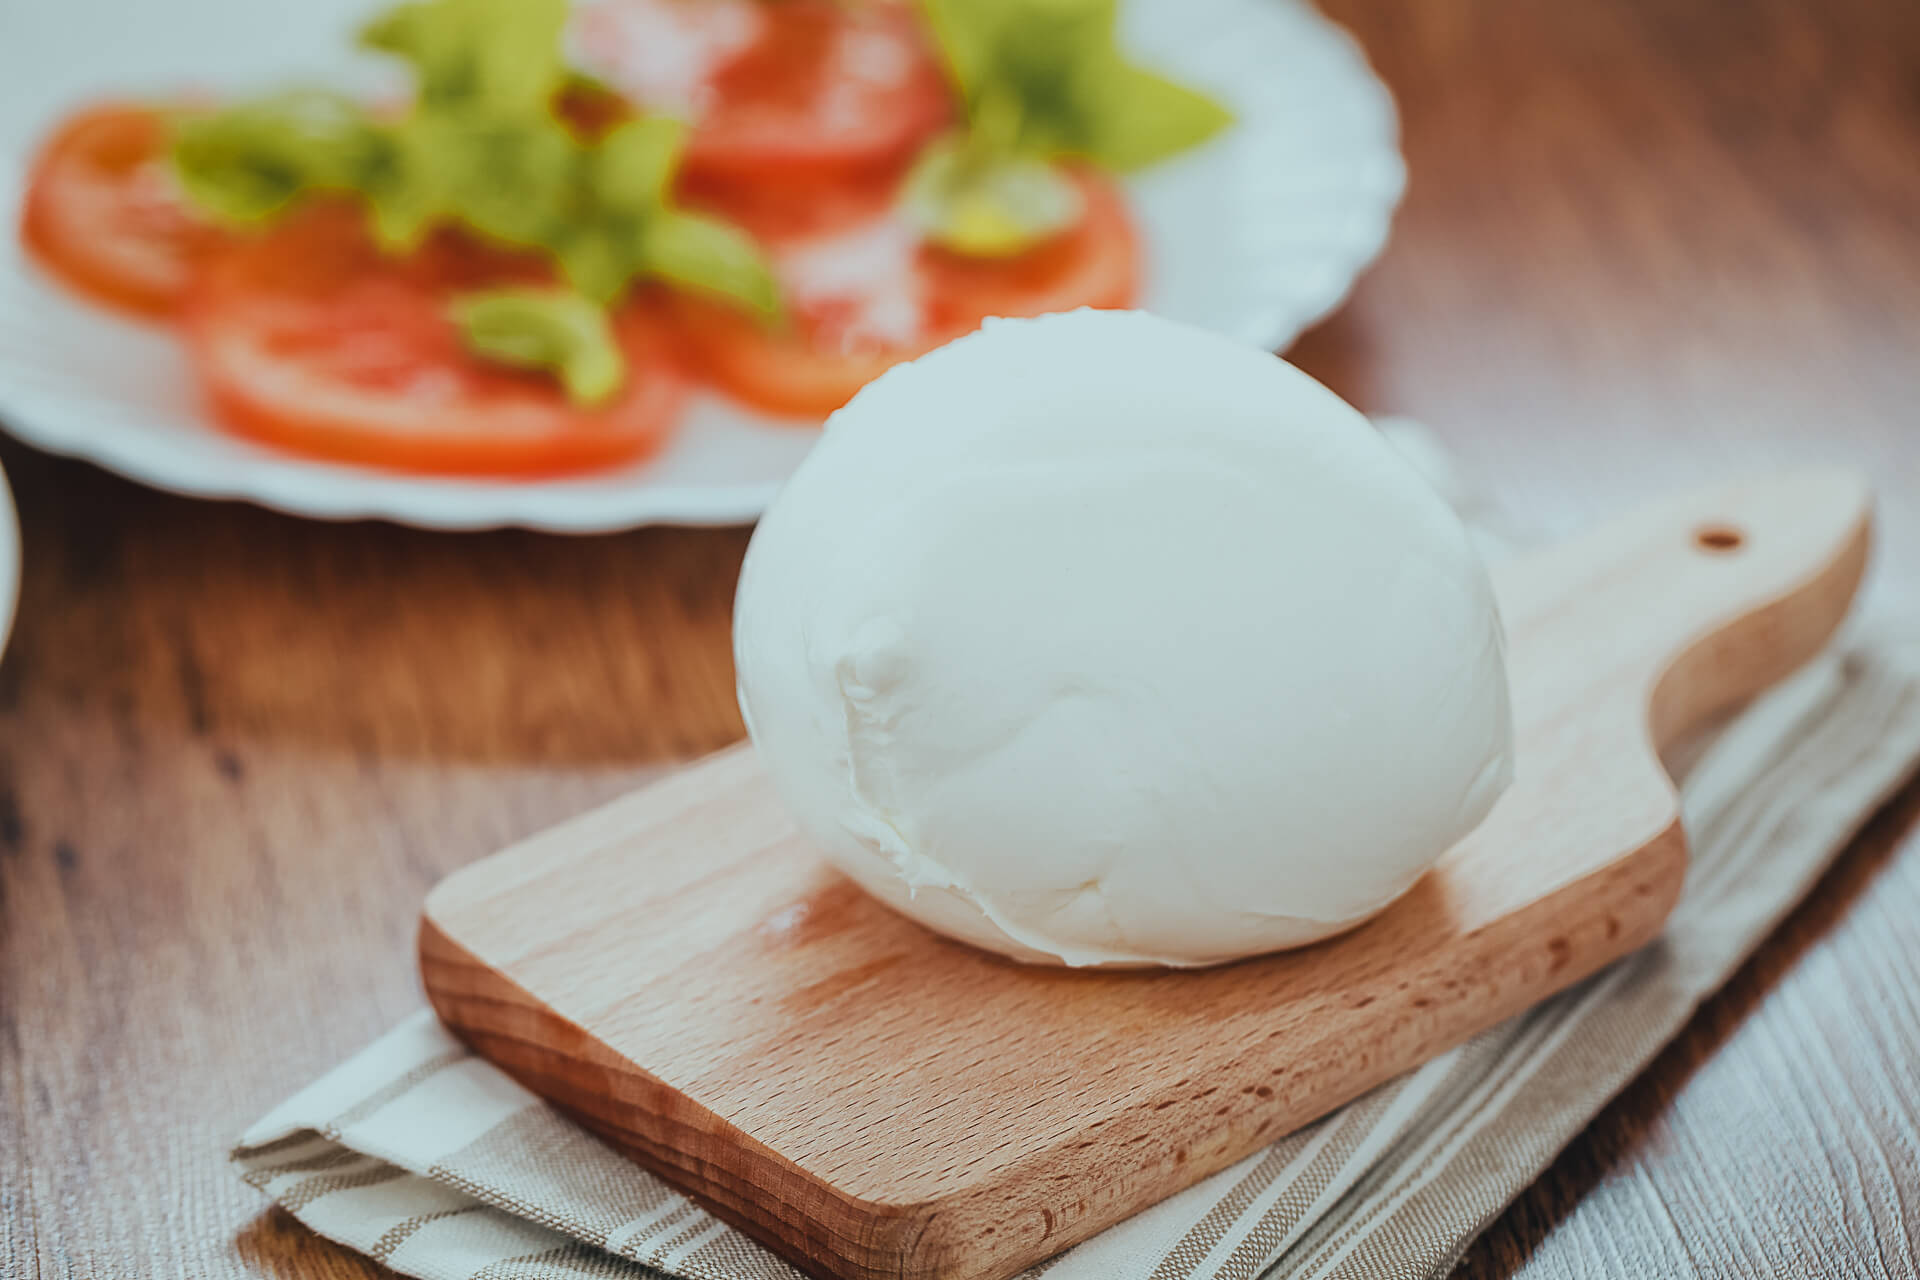
Our Go-To Mozzarella Recipe
This main staple is a true delight and has its origins in southern Italy. When firm, it can be gently grated or simply pulled apart into satisfying strips that are fun to eat. When heated, mozzarella easily melts and adds a mouthwatering texture to pizzas, calzones, pasta, tacos, and the like.
To begin, let’s gather our supplies and ingredients:
- 1 liter non-homogenized milk (raw or pasteurized)
- 2 drops of liquid rennet, diluted in 20 grams of water
- 2 ounces vinegar
- heated water
- natural sea salt
- medium sized knife
- kitchen thermometer
- mixing bowls
- slotted spoon for stirring

In a medium to large bowl, slowly mix the vinegar into the milk while continually stirring it.
Once the vinegar is fully mixed in, you want to carefully heat the milk to about 36° – 37° C (98° – 99° F). You can accomplish this by nesting your mixing bowl into a larger bowl and adding hot water into the outer bowl. If using a stove for this process, be careful not to burn the milk. Stir the milk continually as you heat it up.
Now that the milk is heated to body temperature, stir continuously, and add your rennet.
Allow the mixture to rest for about 14 to 15 minutes.
Check the level of the curd by gently cutting into the mixture. It should be firm. If not, let the cheese sit a little longer.
Begin separating the curds from the whey by slicing up the cheese into chunks. Gently stir with your fingers for about 5 minutes to separate out the curds. Eventually, they will settle to the bottom and the whey can be strained off. Save and set aside the whey to make delicious ricotta cheese later!
Break your mozzarella into even smaller quarter-sized pieces. You can also add your salt at this time. For every pound of mozzarella, add about a teaspoon of salt. As you do this, you can heat up a bowl of water for the next step.
Slowly add hot water to your salted mozzarella. Add just enough water to almost cover the cheese. The key is to not add too much water as you process the curds.
The water temperature should be between 71° – 77° C (160° – 170° F) or even a little bit hotter. The hotter the water is, the better the cheese texture will be, and the less water you’ll have to use. Plus, the less water you use, the more flavorful the cheese will be.
Gently massage the cheese in the hot water bath. The cheese will begin to melt and soften. You can stretch it and pull it apart to evenly distribute the water throughout. Keep dunking it into the hot water and do not allow it to cool. This infuses moisture into the cheese, which is what makes it pliable and soft.
As you practice making your mozzarella, you’ll be able to feel, by touch, when it is ready to begin shaping.
As the mozzarella begins approaching its desired consistency and texture, you can begin forming it into your desired shapes.
At this point, you can ball the mozzarella in your hands and pinch off the portions you desire. You can form the mozzarella into balls, or you can braid it.
Set your mozzarella portions aside to be placed in the fridge. Soft cheeses must always be refrigerated and consumed within about 3 to 4 days.
Gather the family and enjoy it fresh, Caprese style, with olive oil, freshly sliced garden tomatoes, a pinch of pepper, and some basil leaves! Enjoy!
Traditional Buffalo Mozzarella (Mozzarella di Bufala)
Buffalo cheese is a richer and creamier variety of mozzarella. To make mozzarella extra creamy and delicious, use Italian water buffalo milk instead of cow’s milk. In fact, this is the authentic way to make Italian mozzarella. The taste is absolute perfection!

Our Delicious Halloumi Cheese
Also known by its Turkish name “hellim,” this semi-firm and mild Cyprian cheese pairs wonderfully with herbs and olive oil. It has a spongy, rubber-like texture, with a salt-tang flavor. It is especially tasty when grilled and can be added to sandwiches or eaten by itself.
Gather your supplies and ingredients:
- 5 liters of milk, plus 1 liter of milk
- ½ tsp. rennet
- deeply walled large saucepan
- lemon juice
- medium sized knife
- kitchen thermometer
- strainer or small baskets
- slotted spoon

Gather your farm fresh milk. In other words, we are using unpasteurized raw milk. You can either use goat’s, sheep’s, or cow’s milk. Traditionally, a mixture of both sheep’s and goat’s milk is used. To begin, measure out 5 liters of milk into your saucepan.
Heat the milk over low heat until it reaches 35° C (95° F). Stir often to ensure even heating.
While your milk is heating, prepare your rennet. In a small glass, add the rennet to 35° C (95° F) water for easy mixing.
Using a wooden spoon, add the diluted rennet to your milk. Stir thoroughly. Turn off the heat, add an askew lid, and cover the pot with a large towel to trap in the heat. We leave the lid askew so that the cheese can breathe. Let the pot rest for about half an hour.
Now if you’re using an electric stove, move the pot altogether. Place it on a large potholder and then cover the pot with a towel to insulate it. For the best results, avoid setting the pot on a cold surface.
After half an hour has elapsed, remove the towel, and uncover the pot. Slice into the cheese to activate it. Replace the lid but keep it askew. Do this for five more minutes.
Return to the cheese pot and remove the lid. With clean hands, reach into the pot, and break up the cheese. You can accomplish this by picking up the cheese and squeezing it through your fingers. After you have done this for the whole pot and there are no longer any large chunks that remain, cover the pot again for five minutes. This will enable the curds to sink to the bottom of the pan.
Put a strainer on top of the pot and empty out the water into a bowl. This water mixture is known as the whey. We’ll set it aside for use later.
Allow the remaining curds to drain and then begin pressing them into sieves, strainers, or cheese baskets. Traditionally, the warm curds are pressed into handmade Cyprian baskets to finish processing. After they have drained for a bit, each cheese portion can be removed and flipped over. Again, press the cheese curds back into their individual baskets. To further cool the cheese, you can pour chilled water over the pieces.
Now we want to process the whey and remove any remaining curds. Back on the stove, heat up your whey liquid, and add a liter of raw milk to the mixture. Heat to a near boil and add about half a cup of lemon juice. Pour the mixture over a strainer to catch the curds and save the liquid whey. Now you will have delicious curd cheese you can enjoy with salt or other flavorings. We call these extra curds “Lor” or “Nor” cheese. Return the strained water back to the cooking pot and add salt. So basically, you get two kinds of cheese with this one recipe.
Take the cheese you have sitting in baskets and gently remove these cheese portions and place them back into the salted whey water. Now we need to cook this cheese. Simmer your halloumi cheese in brine water until it begins to float.
With a large, slotted spoon, fish out and remove the cheese portions from the stove. Set them into a pan and sprinkle them with salt and any herbs you would like to include. Fresh whole mint leaves go very well with this cheese.
Then press the portions into semi-flat patties. Fold them in half and enjoy them immediately! Both the whey water and cheese should be refrigerated. Use or eat them within a week or perhaps freeze them for enjoyment at a later time. Whey water can be used with other recipes and dishes. For instance, you can boil your pasta in this water. Nothing should ever go to waste in the kitchen.

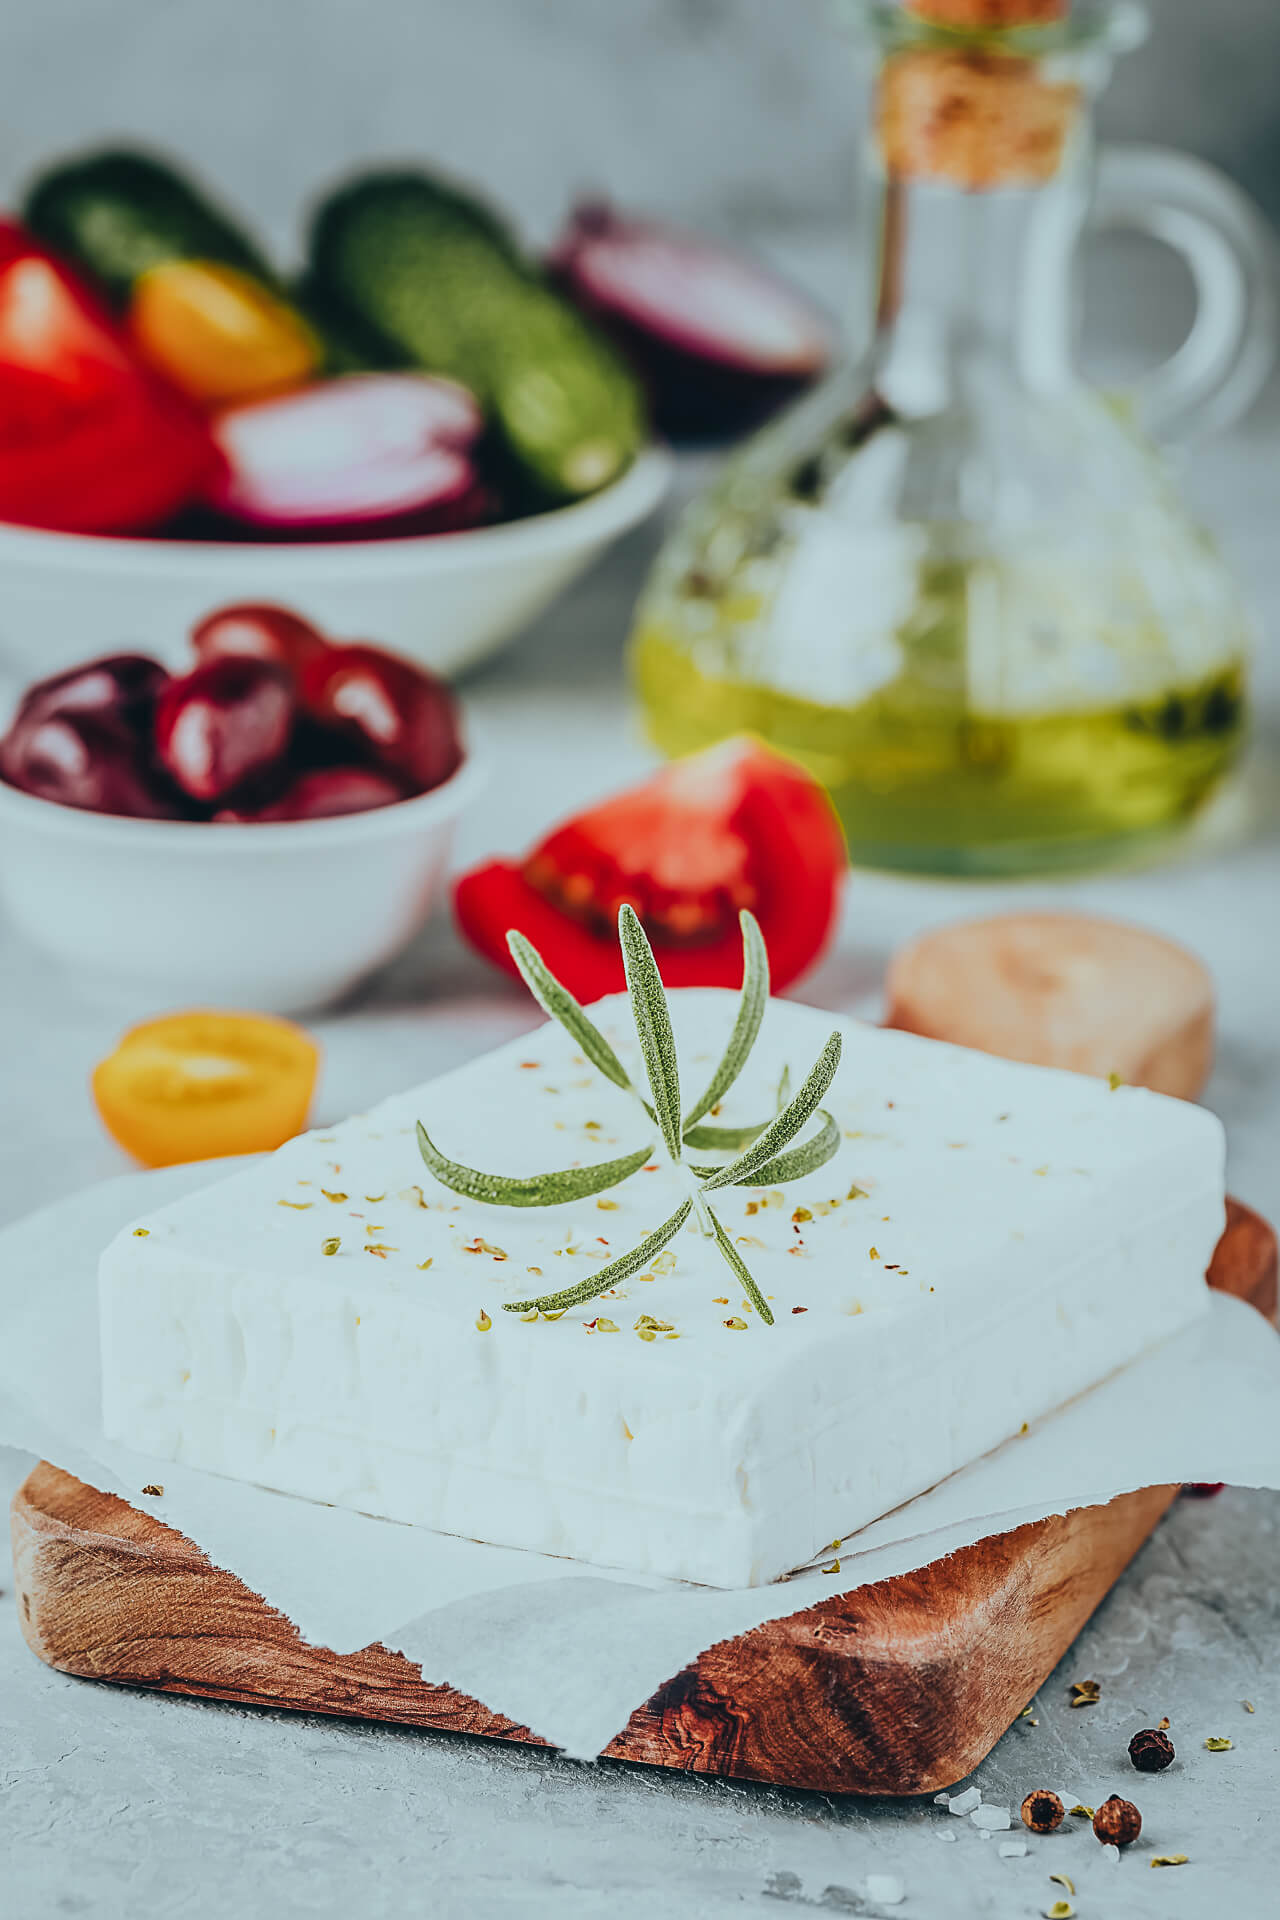
Our Superb Aged Feta
We all love how feta crumbles over some of our best go-to dishes. This highly nutritious Grecian cheese never fails to add a sprinkle of pizzaz to salads, pastas, and the like.
Ingredients and supplies you’ll need to make it:
- 1 liter (1 qt) of goat’s milk (30%)
- 3.5 liters (3.5 qt) of sheep’s milk (70%)
- 1/8th teaspoon mesophilic culture
- 1/4th teaspoon (1.25 ml) liquid rennet
- 1/4th cup of non-chlorinated water
- free-standing strainer
- cheesecloth
- 1/4th teaspoon (1.25 ml) of calcium chloride, diluted in 1/4th cup non-chlorinated water
- large saucepan
- brine solution (10%):
- 2 liters (2 qt) water
- 1 tbs white vinegar
- 250 g non-iodized salt
- 1 tsp calcium chloride
- medium sized knife
- kitchen thermometer

For feta cheese, we want to go with a ratio of 30/70 of goat’s combined with sheep’s milk. Of course, other makers might use a different ratio. For instance, some people go with 10% goat’s milk with 90% Sheep’s milk. We’ve chosen the 30/70 ratio because it makes the feta luxuriously creamy with a hint of peppery tang.
In your large saucepan, add your milk and heat it to 30° C (86° F).
Stir in your mesophilic culture and allow it to infuse into the milk for about an hour. You’ll want to cover your pot for the duration of this step.
Now you’re ready to add your calcium chloride. This will help the mixture curdle. You can also add the rennet at this time. Stir for about a minute. Return the lid and let the mixture sit for another hour.
Check your batch to see if it has firmed up and will cut cleanly with a knife. If so, you are ready to extract the curds. To do this, slice the cheese into chunks with any knife you have on hand. Now let the curds sit for 5 minutes to firm up.
Remove the lid and stir the curds by gently lifting them up and around within the pot. Continue to stir for 20 minutes. You’ll notice that the curds shrink and sink to the bottom.
You’ll need to use your cheesecloth and strainer at this time. Lay the cheesecloth inside the strainer if the holes are too big. Remove the pan from the stove and bring it over to strain its contents over the sink. If you so desire, you can save the liquid rennet mix to make other cheese or use it with other food recipes. Let the curds sit in the strainer for a while, until the excess liquid is fully released.
At this time, scoop out the cheese curds into small square baskets. You can use cheesecloth to line these baskets if you like. Be sure to press the curds down firmly into the baskets.
You can use any sufficiently heavy item (of about 4 lbs.) to weigh your cheese down. Allow the cheese curds to set up within the baskets for 2 hours. After 2 hours take out the newly formed cheese bricks. Flip them over and return them to the baskets to form up for another 2 hours.
Finally, remove the cheese bricks from their baskets and house them in the brine solution for at least 3 – 4 days at room temperature. For the best results, both the cheese and the brine should have a pH of between 5.2 and 4.8.
Now, you can store your feta for between 4 months to a year in the fridge at 4° C (39° F). The longer it ages, the tangier it will be…though as addictive as it is, it will probably be consumed long before that.

Conclusion
Cooking and making farm-fresh food from scratch is such a joy, especially when the endeavor is shared with dear friends and loved ones. If you are working toward self-reliance and off-grid living, learning how to make your own cheese products is a great skill to have.
Thank you so much for joining us today in the kitchen. We hope we’ve added just a little bit of flavor to your day! Feel free to share your thoughts, questions, and experiences with cheesemaking in the comments below!
To your abundant health!

Summary
The most important details in this text are the ingredients needed to make farm fresh cheese. These include non-homogenized milk, liquid rennet, vinegar, heated water, salt, a knife, kitchen thermometer, mixing bowls, and a slotted spoon for stirring. The first step is to slowly mix the vinegar into the milk while continually stirring it. The second step is to carefully heat the milk to 36° – 37° C (98° – 99° F) by nesting the mixing bowl into a larger bowl and adding hot water into the outer bowl. Heat the milk to body temperature and add rennet.
Allow the mixture to rest for 14-15 minutes. Check the level of the curd and separate the curds from the whey. Break the mozzarella into quarter-sized pieces and add salt. Heat up a bowl of water and slowly add hot water to the salted mozzarella. Massage the cheese in the hot water bath to melt and soften it.
Form the mozzarella into desired shapes and pinch off portions. The most important details in this text are the steps to make mozzarella, buffalo mozzarella, and halloumi cheese. To make buffalo mozzarella, use Italian water buffalo milk instead of cow’s milk, and to make halloumi cheese, use semi-firm and mild Cyprian cheese. Gather your supplies and ingredients: 5 liters of farm fresh milk, 12 tsp. rennet, deeply walled large saucepan, lemon juice, knife, kitchen thermometer, strainer, and slotted spoon.

Heat the milk over low heat until it reaches 35° C (95° F). Add the rennet and stir thoroughly. Cover the pot with an askew lid and let it rest for half an hour. After half an hour, remove the towel and uncover the pot. Slice into the cheese and replace the lid for five more minutes.
The most important details in this recipe are the steps to process the halloumi cheese. The first step is to break up the cheese and cover the pot for five minutes. The second step is to press the remaining curds into sieves, strainers, or cheese baskets. The third step is to heat up the whey liquid and add a liter of raw milk and lemon juice. The fourth step is to cook the halloumi cheese in brine water until it begins to float.

The fifth step is to remove the cheese portions from the stove and set them into a pan and sprinkle them with salt and herbs, then press them into semi-flat patties and fold them in half and enjoy them immediately. The whey water and cheese should be refrigerated and used within a week or freeze for later use. To make feta cheese, the ratio should be 30/70 of goat’s combined with sheep’s milk. The ingredients and supplies needed include 1 Liter (1 qt) of Goat’s Milk (30%), 3.5 Liters (3.5 qt) of Sheep’s Milk (70%), 1/8th Teaspoon Mesophilic Culture, 1/4th Teaspoon Liquid Rennet, Non-Chlorinated Water, Free-Standing Strainer, Cheesecloth, Calcium Chloride, Brine Solution (10%), White Vinegar, 250 g Non-Iodized Salt, Calcium Chloride, Medium Sized Knife, Kitchen Thermometer, White Vinegar, Non-Iodized Salt, Calcium Chloride, Medium Sized Knife, Kitchen Thermometer. Cooking and making farm-fresh food from scratch is a great skill to have if you are working towards self-reliance and off-grid living.
To do this, you need to use cheesecloth and strainer, remove the pan from the stove, strain the curds, scoop out the cheese curds into small square baskets, press the curds down firmly, and allow the curds to set up for 2 hours. After 2 hours, take out the newly formed cheese bricks and return them to the baskets to form up for another 2 hours. Finally, store the cheese bricks in the brine solution for 3-4 days at room temperature.
REFERENCES
Halloumi Cheese
Refika’s Kitchen
What is halloumi cheese
DW Food
Mozzarella Cheese
What is mozzarella cheese
5 questions that you have asked yourself about buffalo mozzarella
Tasty (Buzz Feed) Channel Video
Vito Iacopelli
Babylonstoren Farm Video
Gavin Webber
How buffalo mozzarella cheese got its name
Feta
Insider Food
The Recipe I Used – Gavin Webber Video
Give Cheese a Chance Video
Thanks for joining us and coming along on this journey of discovery. To learn more about sustainable living and farming, please check back often for new articles.
Related posts


Tagged Aged Cheese, Buffalo Mozzarella, Caprese, Cheese Cloth, Cheese Curds, Cheese Making Ingredients, Cheese Making Process, Cheese Making Steps, Cheese Making Supplies, Cheese Recipes, Cheese Varieties, Farm Fresh Cheese, Feta Cheese, Goat’s Milk, Halloumi Cheese, Homemade Cheese, Italian Cheese, Italy, Mozzarella Recipe, Sheep’s Milk, Soft Cheese, Turkish